
Our raised garden beds from last year did so well that I decided to put in some larger raised garden beds this spring.
This is how I built our larger sized cedar raised gardens. Building these garden beds is a great and simple DIY project that can easily be accomplished in an afternoon.
I chose to make these garden beds larger because now I have a better idea of how the plants we grow tend to behave, and because I knew after last year’s season that we would need to expand our total square footage as we become more self-sustaining.
I suspect we will add even more beds next year, so stay tuned!
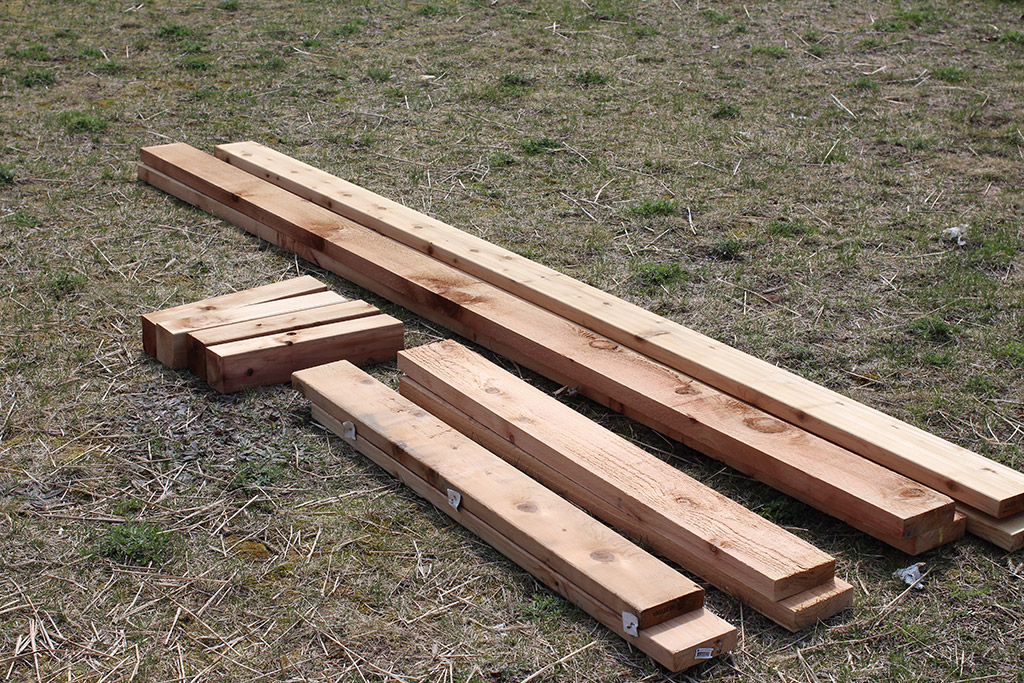
Large Raised Garden Beds Materials List
For each garden bed, you will need the following materials:
- 4 cedar 2×6 – four foot length
- 4 cedar 2×6 – ten foot length
- 4 cedar 4×4 – about 14-16 inch length (the longer these are, the deeper you need to dig!)
- 2 1/2 inch wood screws
- 4′ wide landscape fabric
- 4′ wide hardware cloth
You will also need a drill and bits, a saw if you need to make cuts. You’ll want a razor and some aviator’s sheers or tin snips
for cutting as well. Shovels, post hole diggers, hoses, etc. for filling and putting the beds in the ground.
I recommend pre-drilling all your screw holes!
A tape measure and carpenter’s square can be used if you’re into perfection (I’m not.)
Building Large Raised Garden Beds
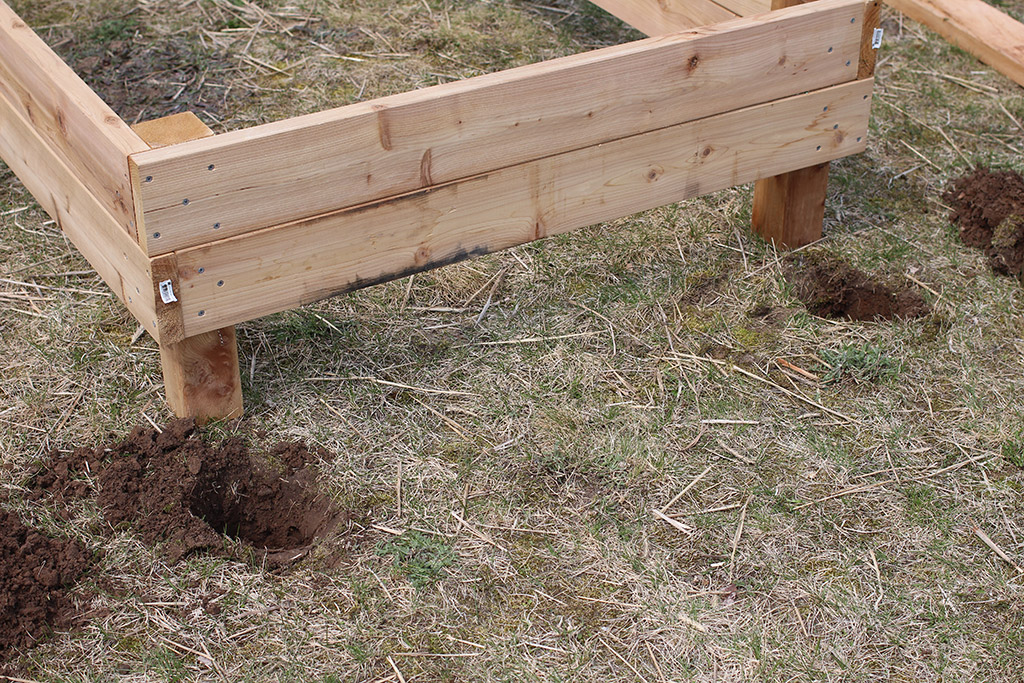
Step 1 – Attach a 2×6 to a 4×4
Line up one of the 4 foot lengths of 2×6 and attach it to one of the 4×4’s. It helps to use some of the other boards to line things up nicely. You will want the end of the 2×6 to be even with one of the ends of the 4×4 for this step.
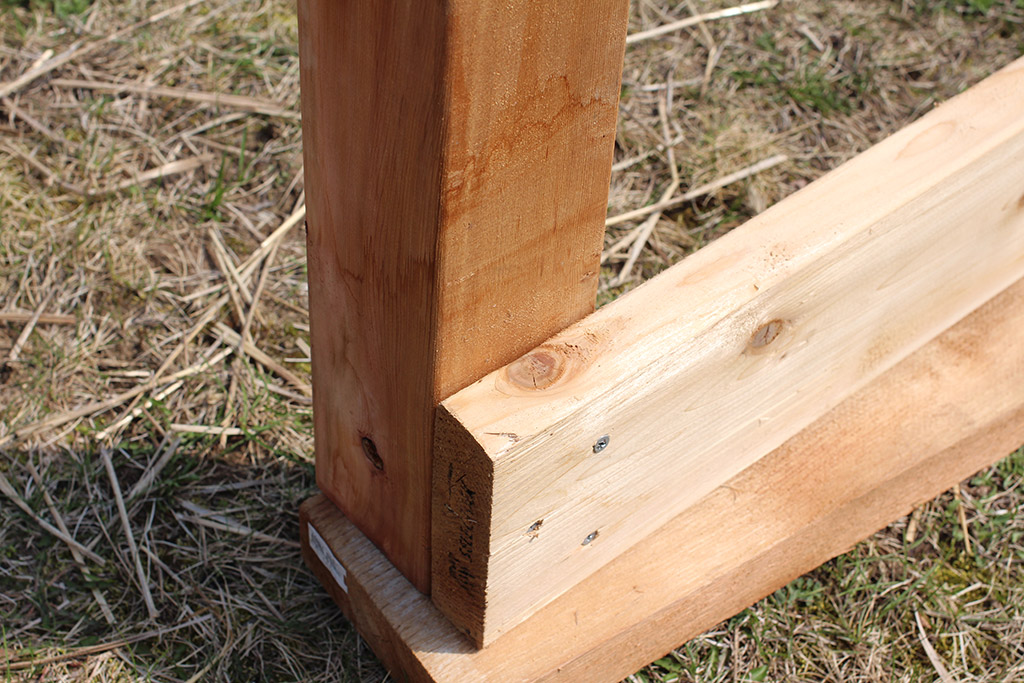
Step 2 – Attach another 2×6 to make a corner
Next attach one of the 10 foot lengths of 2×6 to the assembly you made in the last step. This time the end of the 2×6 should line up with the edge of the first board to make a nice corner.
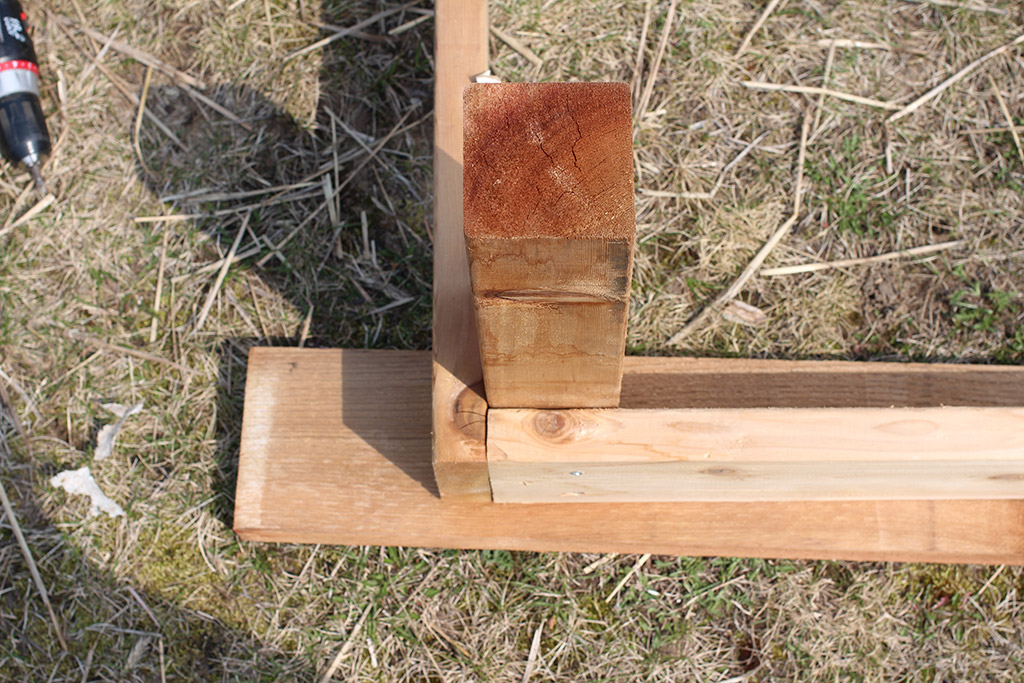
Step 3 – Make additional corners
Next you will continue to add 4×4 and 2×6 pieces around the perimeter of the bed until you have a rectangle. The main thing to focus on here is that you are alternating which side of the bed is flush with a 4×4 post and which is flush with the side of the garden bed. It’s easier to understand what I mean by looking at the pictures.

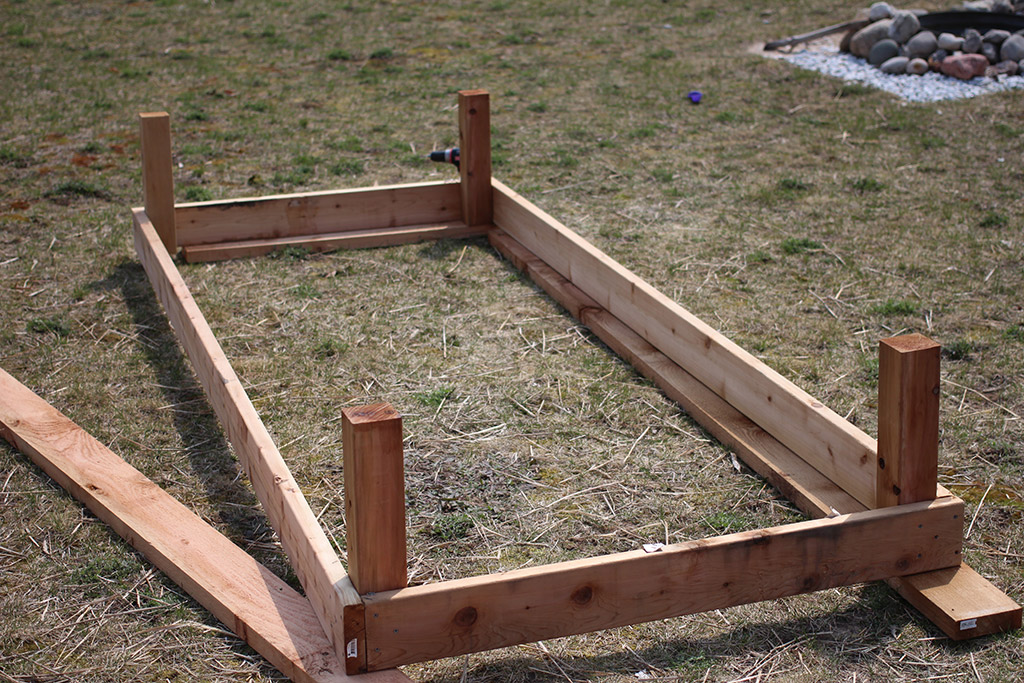
Step 4 – Add a second set of 2×6
Finish the frame of you garden bed by adding a second set of 2×6’s. I alternated which side was flush with a post and which was flush with an edge to create a “step” look but you can line them up evenly if that suits you.

Installing Your Raised Garden Beds
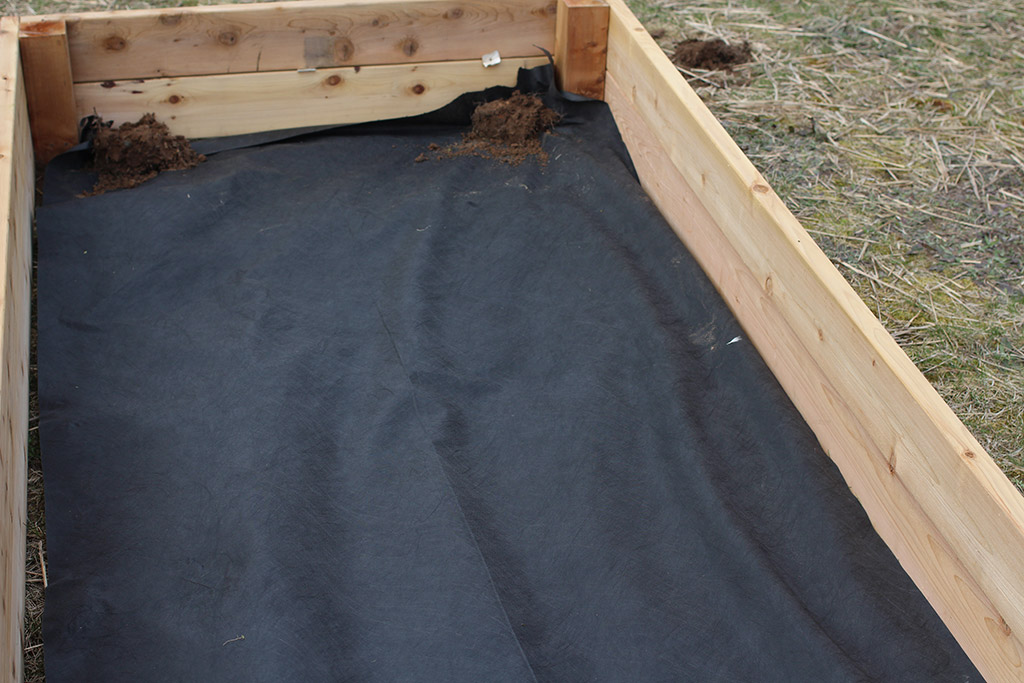
Now that the frame of the bed is complete, flip it over and decide where you want to dig your post holes. They shouldn’t have to be very deep. Once you have your four holes, slide the bed in but do not fill the holes yet!
At this point, you will want to roll out some landscape fabric. Make it about a foot longer then the bed on each side and slide under the shorter sides (this is why you didn’t fill your holes in yet.) Clumps of sod can help you keep one side down temporarily.
Once the landscape fabric is in, roll out and cut the hardware cloth in the same manner. Cut flaps and fold in to go around the raised garden bed posts and slide under the walls like you did for the fabric. If you have a big rodent problem you can do two rows of hardware cloth and staple to the sides… I wasn’t that worried about it.
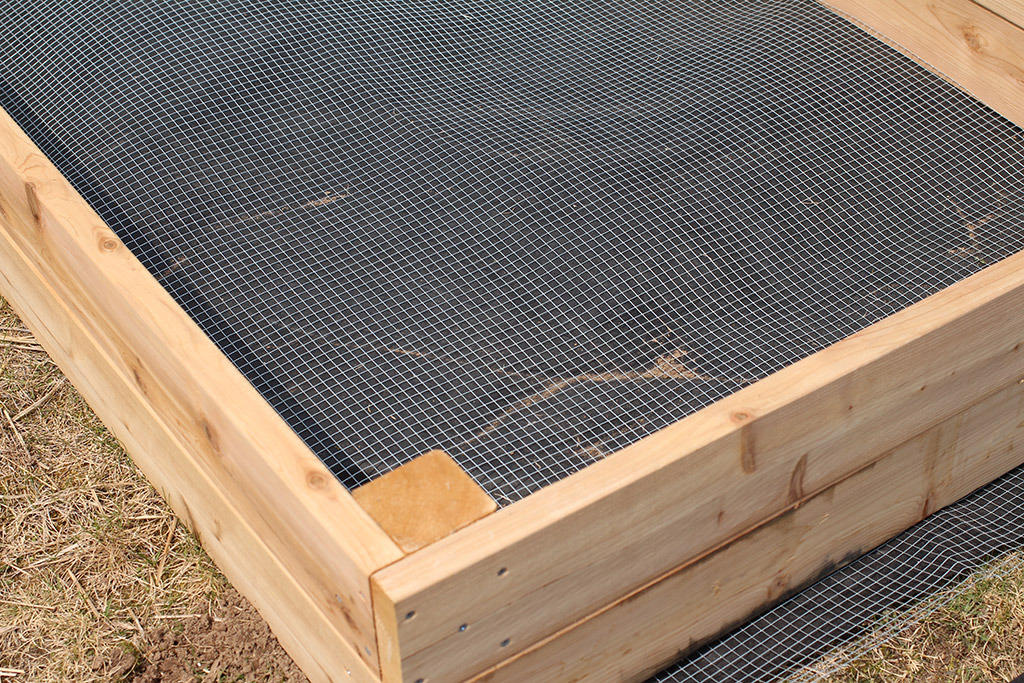
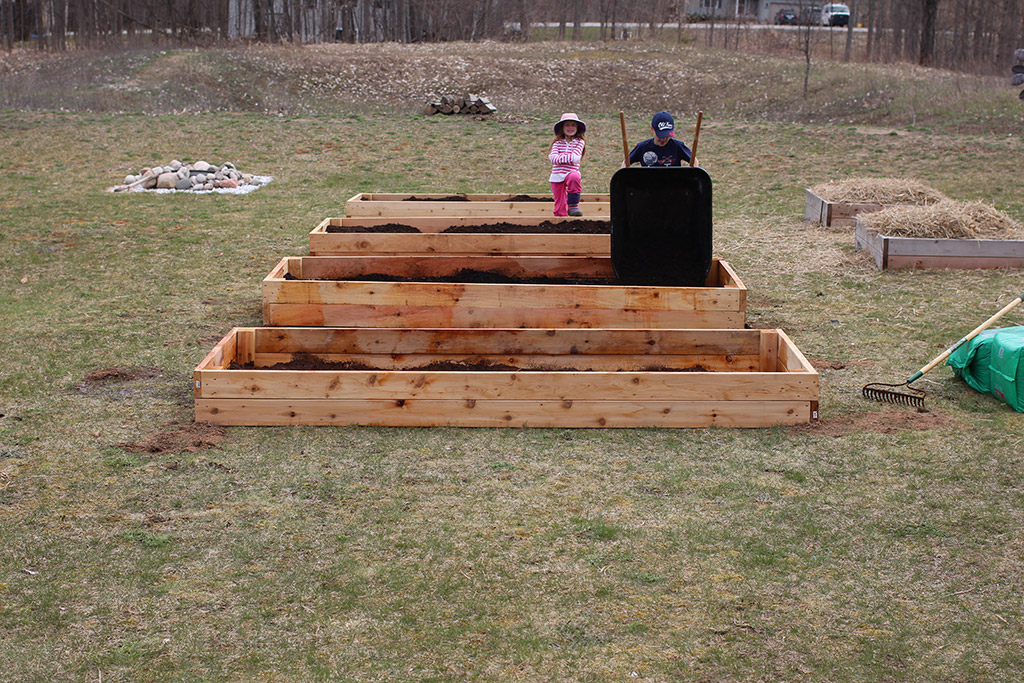
Once you’ve gotten this far, you have a raised garden bed that is ready to be filled!
How I Filled My Raised Garden Beds
I like to fill my raised garden beds with a mixture of Peat Moss, Compost, and Vermiculite.
The whole family was involved in this and had a lot of fun.

For these beds we first put a 3.8 cubic foot bale of peat moss into the bed and spread it out with a rake. Then we thoroughly soaked the mix and did some more raking.
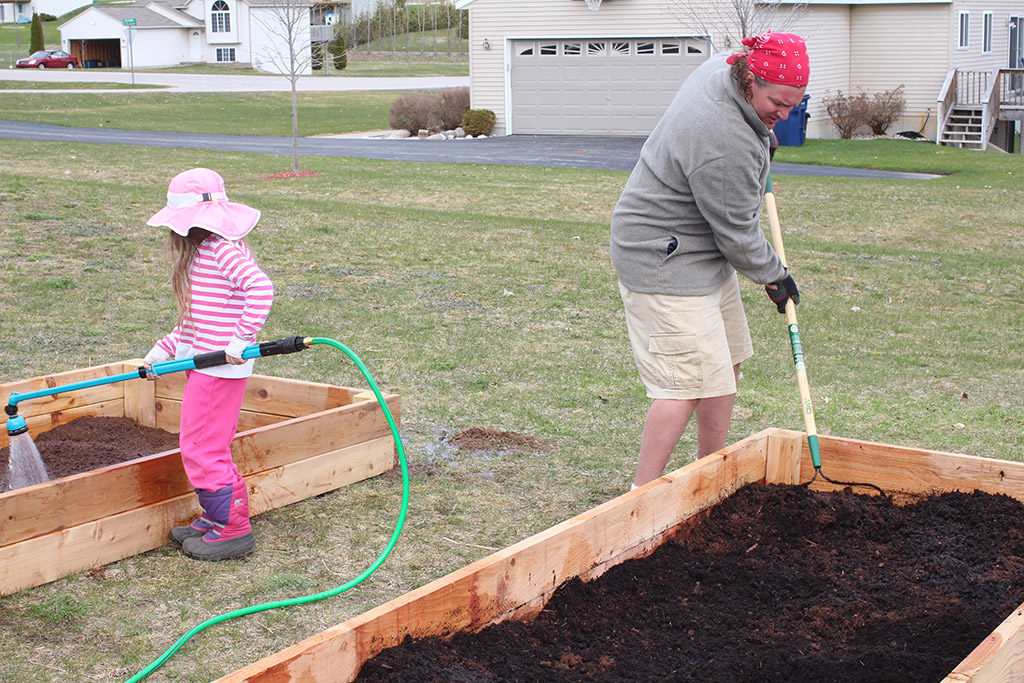
Next we added a bunch of compost and mixed this up with a rake creating a peat/compost mix. Continue adding water and raking.
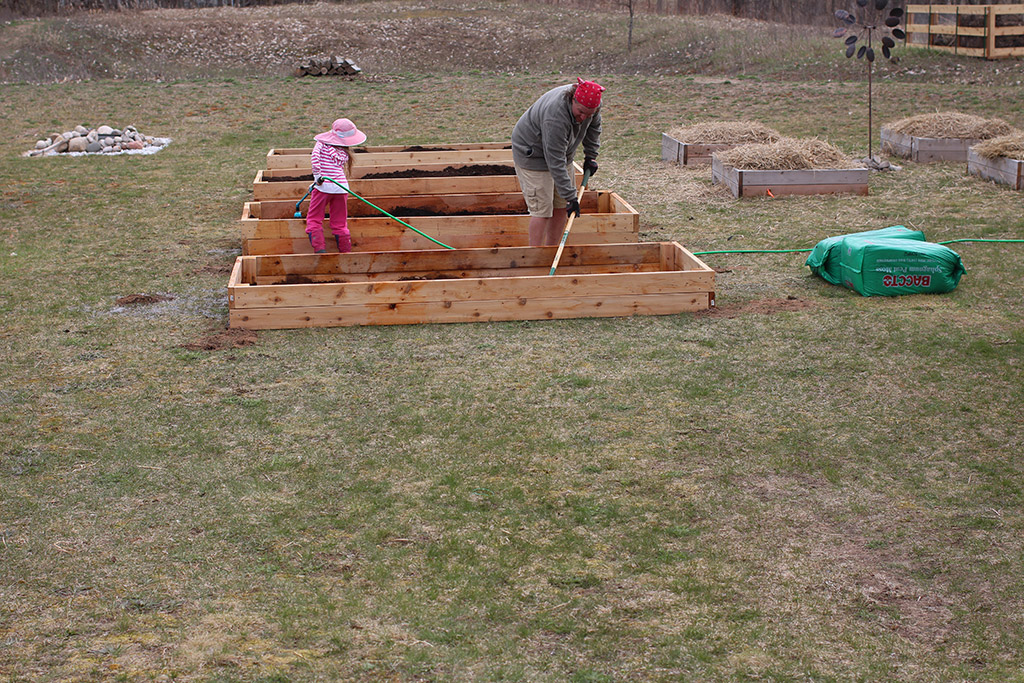
Once this mix was soaked, I let it sit for a day so the peat could absorb more water. We finished filling the beds by adding a bag or two of vermiculite, another half bale of peat, and the rest compost. We also tossed in some of our worm casings. The main thing you will be doing is raking and watering. Lots and lots of raking and watering.


Comments are closed.