These are the steps I used for planting fruit trees in our yard to create a sort of “backyard orchard.” I have wanted to plant fruit trees since we moved here and we live in a climate that is great for a wide variety of fruit here in the north. This is the first time I have planted trees so I will not claim to be an expert. This is the result of my own personal research as well as adapting to the soil type here on our growing homestead.
Planning for Fruit Trees
The first part of fruit trees is to consider what sort of fruit you would like to grow. You should take into account how much space you have for your orchard as well. If you are using a standard orchard style of rows like I did, you will need a fair amount of space between trees. You can use a guide like this one from the arbor day foundation to help you plan. Pick fruit you like to eat!
There are three basic sizes of most fruit trees that you can get. Standard trees are the largest and can grow quite large and require the most space. The smallest trees are known as dwarf and can be kept small enough to grow in large containers. For our orchard we selected semi-dwarf trees which are in between the two. Both dwarf and semi-dwarf trees have their size controlled by being grafted on to various “root stocks.”
Do your research before ordering your fruit trees! There are a variety of ways to plant fruit trees ranging from standard rows to specialized “intensive” methods which allow you to grow a lot in a small amount of space. We picked the method of rows not only for the fruit production but the aesthetics as well. Many fruit trees have pollination requirements, and not all fruit trees grow well in all climates.
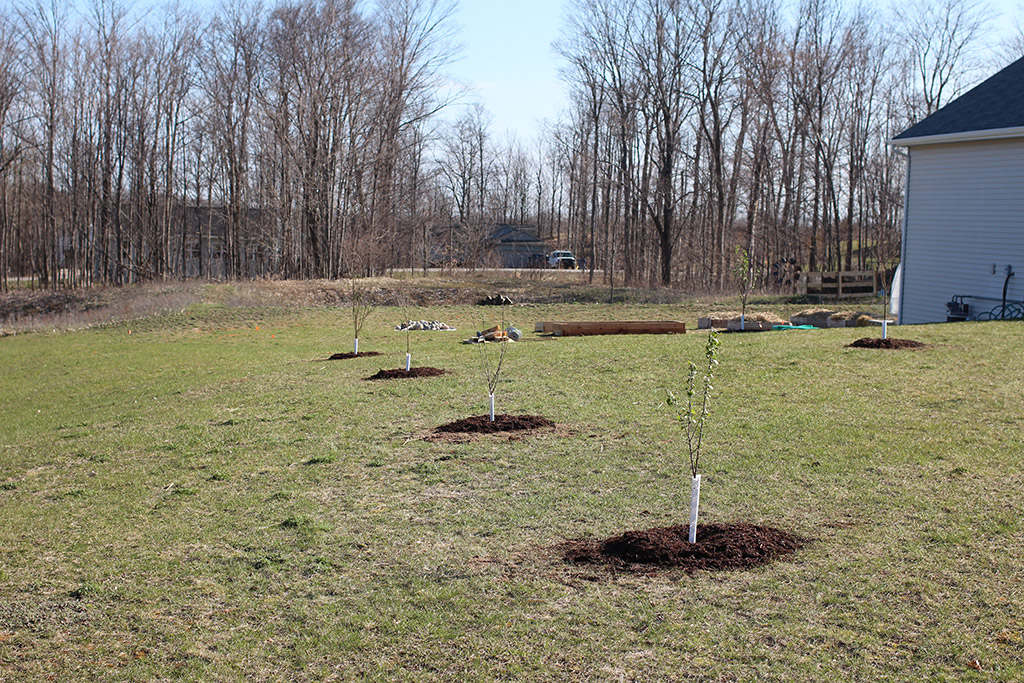
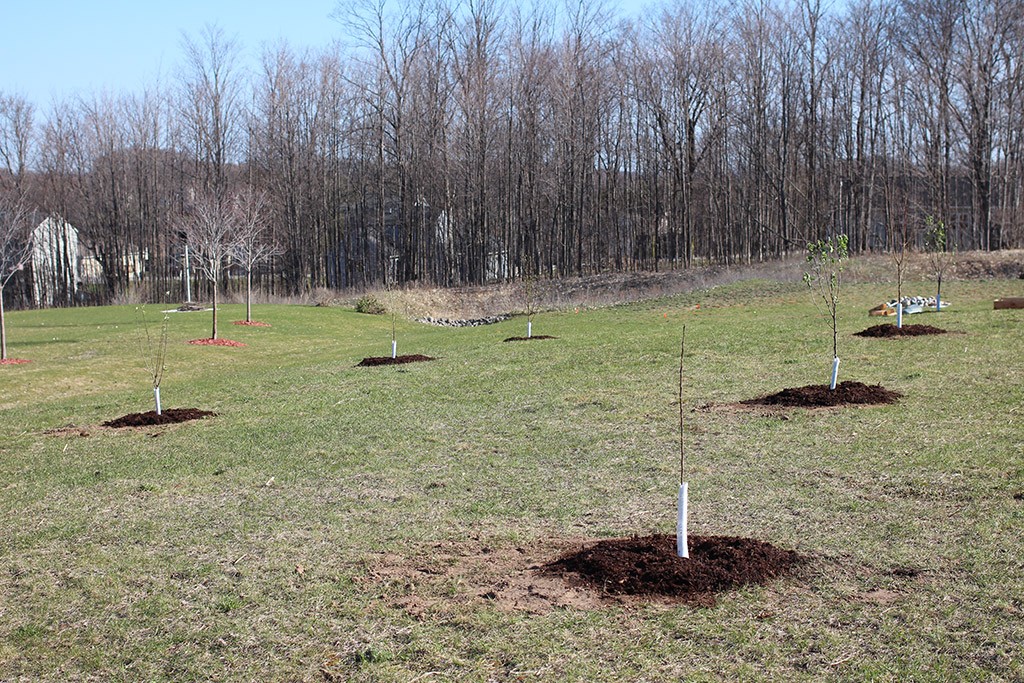
For our small orchard I selected nine trees to join our existing potted dwarf citrus trees. We selected one cherry tree with four varieties grafted on to one tree, one pear with four varieties grafted on to one tree, four apple trees (these will be great for eating an making applesauce,) two peach trees, and one nectarine tree.
Planting Bare Root Fruit Trees
Here are the steps I used for planting our fruit trees. As I mentioned before I am not an expert in planting fruit trees. This is the result of my research and adapting to our soil conditions. Some things to keep in mind while researching are understanding how your soil drains, what sort of soil it is, how you will get water to the trees, and spacing.
We planted in rows with a lot of spacing (20′ feet between trees in both directions.) If we decide to keep the trees pruned to a smaller size we can always add an additional staggered row of fruit trees in the middle!
Before You Start
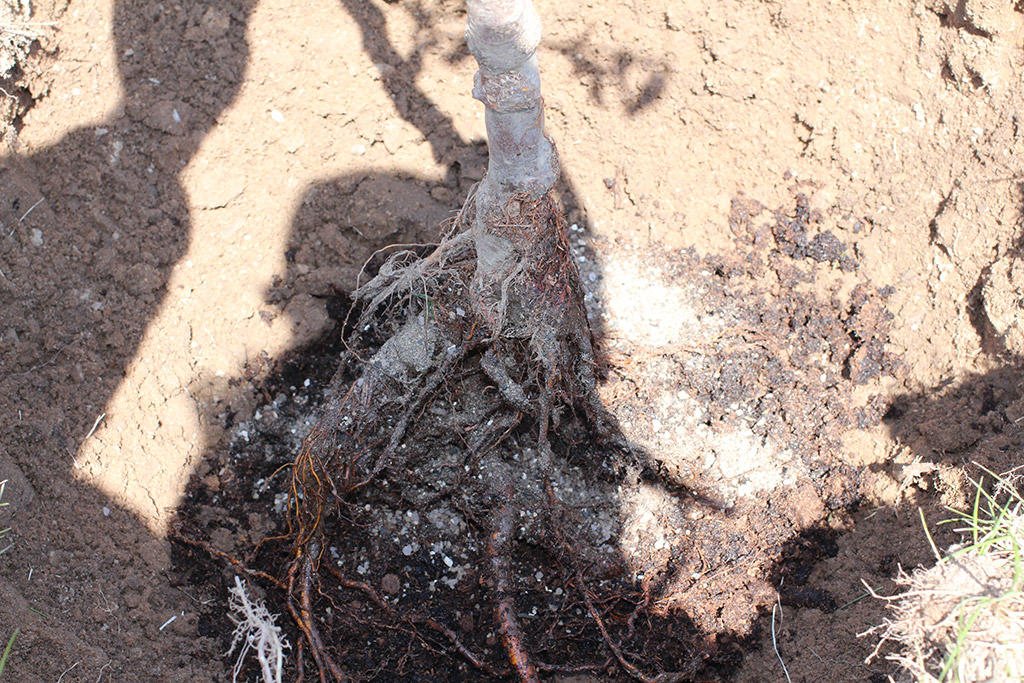
Soak your roots in water! I placed the trees in five gallon buckets for about 3-4 hours. This will make sure your plants are well hydrated prior to planting and help to loosen up the root balls.
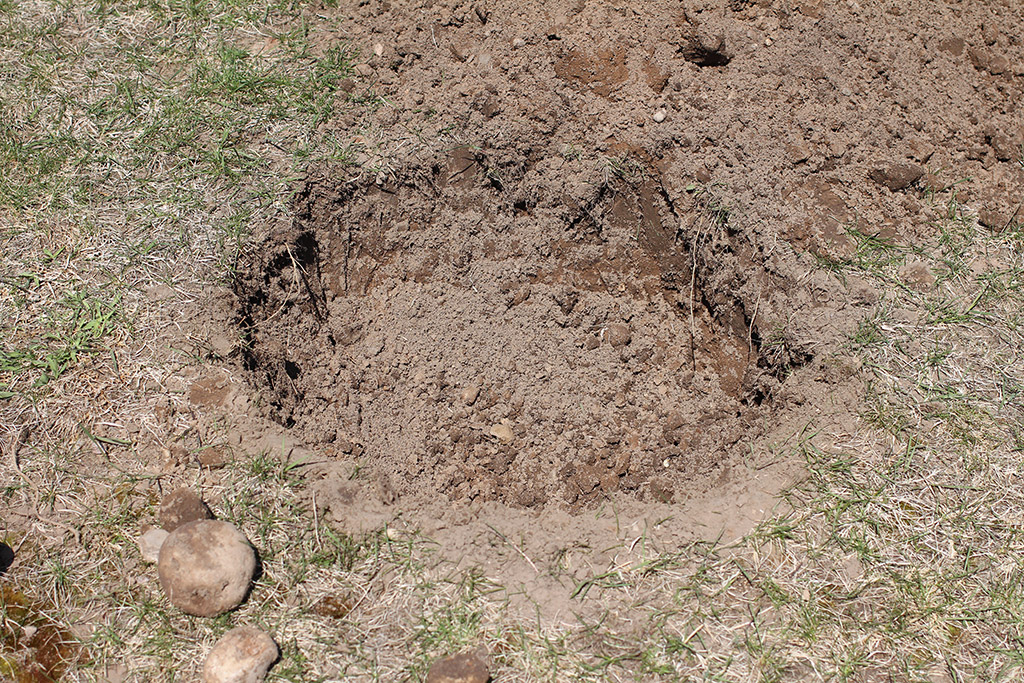
Step One – Digging!
The first thing to do is dig a hole for each tree. The hole should be about three times wider then your root ball and twice as deep. Digging the holes is easier then you think… unless you run into small boulders like I did for several of the holes!
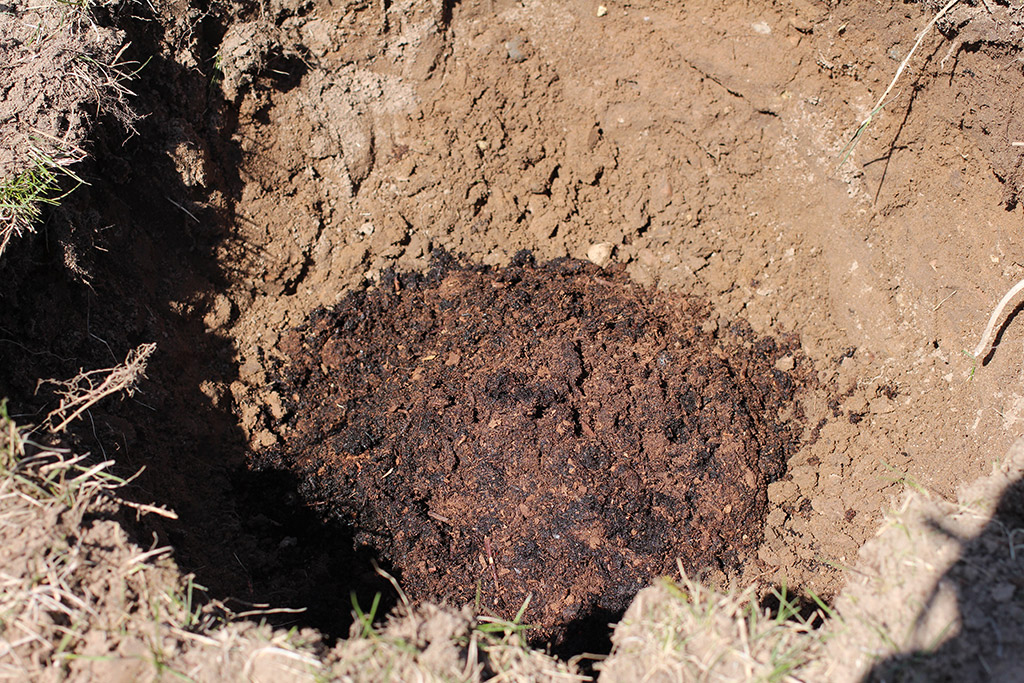
Step Two – Create a Mound in the Center of the Hole
The next thing to do is to create a mound in the center of the hole for the root ball to rest on top of. In our case I amended the existing soil for the mound with some compost and soaked peat since our soil is so sandy. The main takeaway here is you need a mound in the bottom of your hole for the tree to rest on.
Step Three – Place the Tree
The next thing to do is to place the tree on top of the mound you created. This is a good time to do some pruning of the roots. Prune down any extra long roots or roots with damage. Gently spread the roots out and place the tree on to the mound inside the hole. You can sprinkle some mycorrhizal fungi on the roots at this point if you are using it (I did.)

Step Four – Fill Your Hole Back In
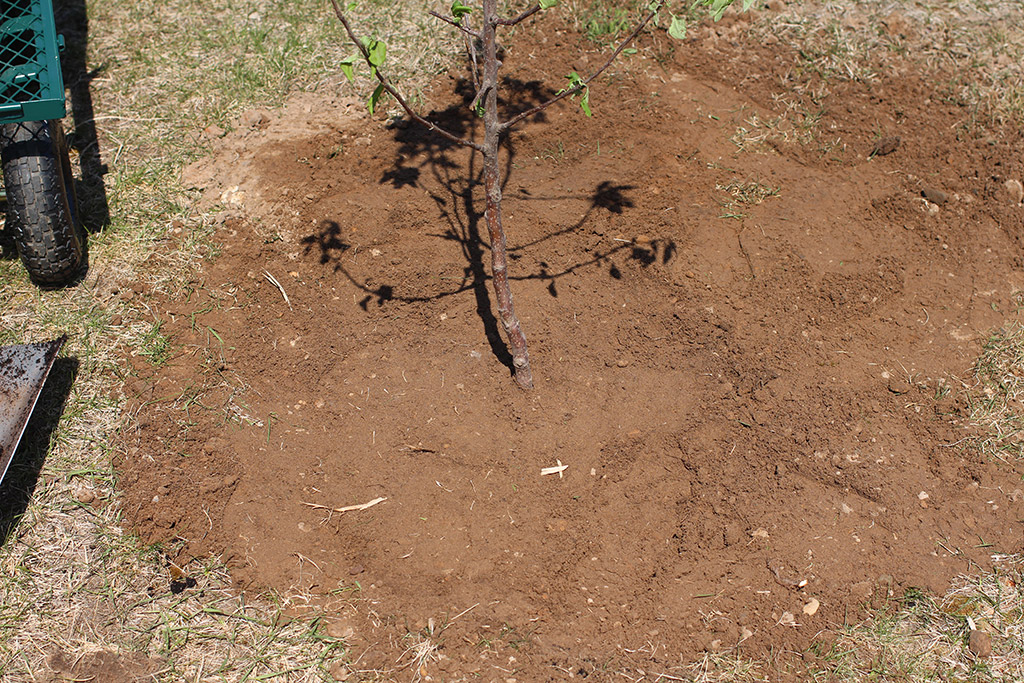
The next thing to do is to refill the hole. I used mainly the existing soil but did add a small amount of compost to it. Once you add a few handfuls of soil back into the hole the tree should start to stand up on it’s own. Make sure you get the tree as straight up and down as you can!
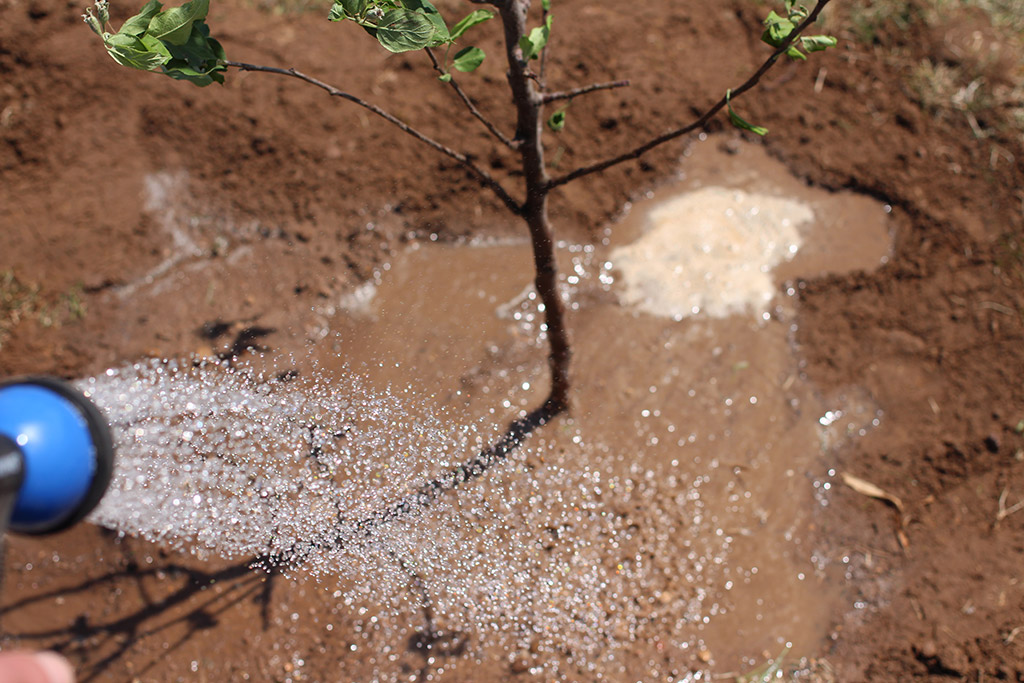
While filling the hole you will want to add lots of water. This is known as “watering in” the tree and will help to remove any air pockets in the soil. Be gentle when tamping the soil down. I lightly used my foot – there is no need to super compact the soil.
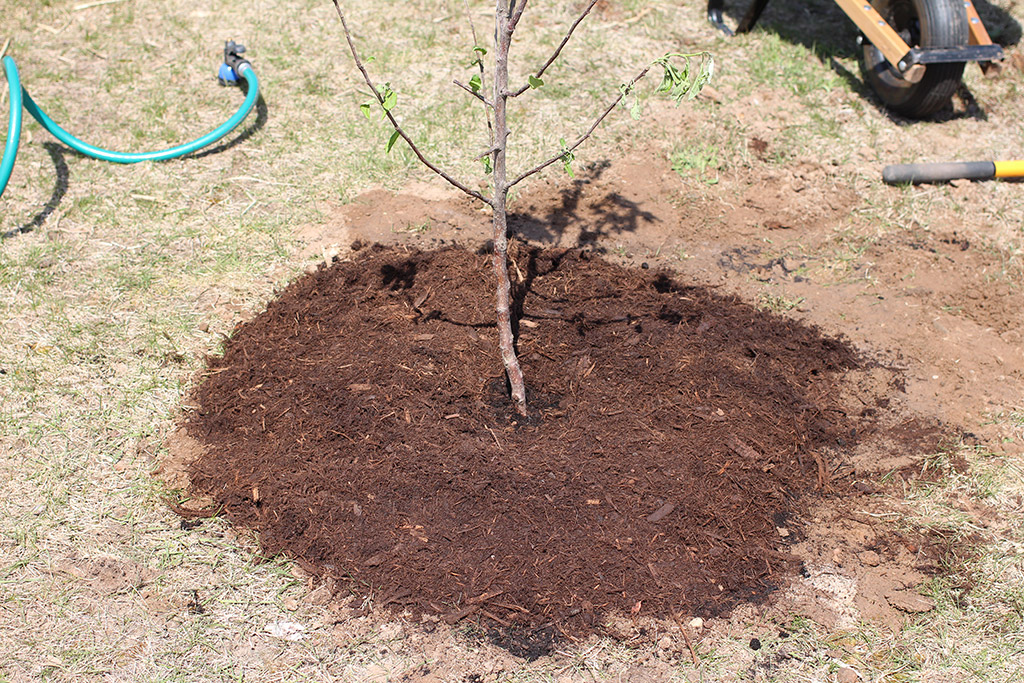
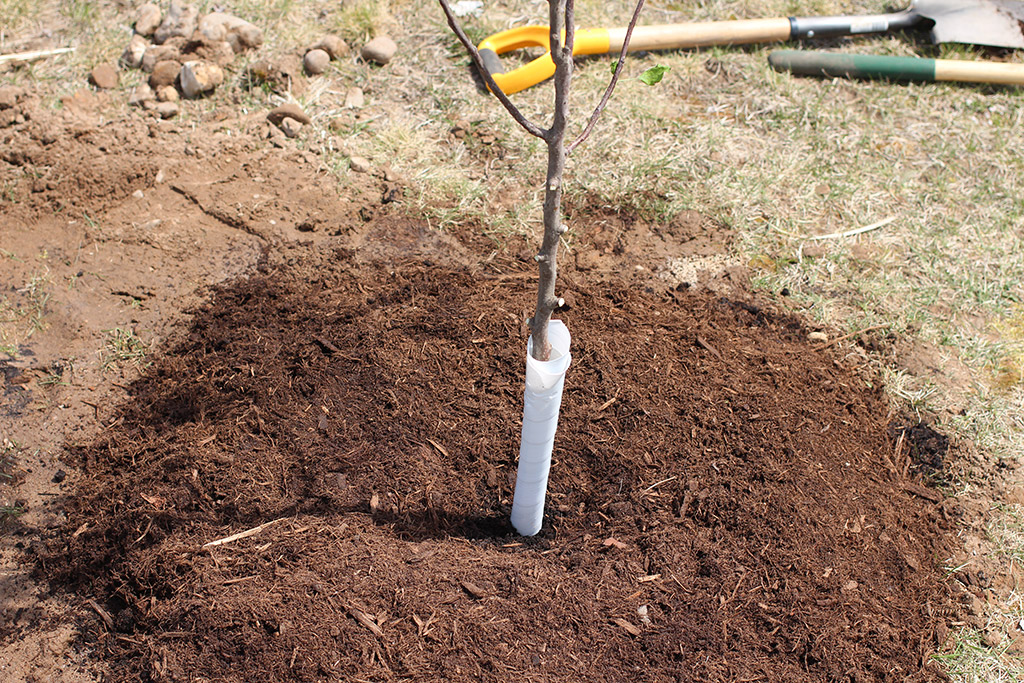
Step Five – Dress the Tree Up
The final thing to do is add the finishing touches. I mulched around each tree using a hard wood mulch. The mulch is several inches deep in circular in shape. Be careful to not touch the trunk of your new trees with mulch. Stop a few inches away from the trunk.
I wrapped our trees with trunk wraps. These can help protect the tree from critters as well as any stray mulch that gets too close. These wraps expand easily as the tree grows.
An important thing to do at this point is to prune the tree. Remove any broken branches. You can remove a fair amount of branch growth as well. Remember, your bare root tree had some root loss when it was removed from the nursery as well as when you pruned the roots. Pruning the tops of the trees is not going to hurt the tree but will help it to grow into a stronger tree in the long run.
Homestead Orchard
Here are our fruit trees after planting. Remember to give your trees space to grow, to make sure your soil is well drained, and to give them plenty of water! Let me know what you think!